Getting Help
If you ask users what feature of the Linux Operating System they most enjoy, many will answer "the power provided by the command line environment". This is because there are literally thousands of commands available with many options, making them powerful tools.
However, with this power comes complexity. Complexity, in turn, can create confusion. As a result, knowing how to find help while working in Linux is an essential skill for any user. Referring to help allows you to be reminded of how a command works, as well as being an information resource when learning new commands.
Навигация по статье:
- 1.1 man Pages
- 1.1.1 Viewing man pages
- 1.1.2 Controlling the man Page Display
- 1.1.3 Sections of the man Page
- 1.1.4 man Page SYNOPSIS Section
- 1.1.5 Searching Within a man Page
- 1.1.6 man Pages Categorized by Sections
- 1.1.6.1 Determining Which Section
- 1.1.6.2 Specifying a Section
- 1.1.6.3 Searching Sections
- 1.1.7 Searching man Pages by Keyword
- 1.2 info Command
- 1.2.1 Displaying Info Documentation for a Command
- 1.2.2 Moving Around While Viewing an info Document
- 1.2.3 Exploring info Documentation
- 1.3 Additional Sources of Help
- 1.3.1 Using the –help Option
- 1.3.2 Additional System Documentation
- 1.4 Finding Commands and Documentation
- 1.4.1 Where Are These Commands Located?
- 1.4.2 Find Any File or Directory
- 1.4.3 Count the Number of Files
- 1.4.4 Limiting the Output
1.1 man Pages
As previously mentioned, UNIX was the operating system from which the Linux foundation was built. The developers of UNIX created help documents called man pages (man stands for manual).
Man pages are used to describe the features of commands. They will provide you with a basic description of the purpose of the command, as well as provide details regarding the options of the command.
1.1.1 Viewing man pages
To view a man page for a command, execute man command in a terminal window. For example, the command man cal will display the man page for the cal command:
CAL(1)                    BSD General Commands Manual             CAL(1)

NAME
cal, ncal -- displays a calendar and the date of Easter

SYNOPSIS
cal [-3hjy] [-A number] [-B number] [[month] year]
cal [-3hj] [-A number] [-B number] -m month [year]
ncal [-3bhjJpwySM] [-A number] [-B number] [-s country_code] [[month]
year]
 ncal [-3bhJeoSM] [-A number] [-B number] [year]
 ncal [-CN] [-H yyyy-mm-dd] [-d yyyy-mm]

DESCRIPTION
    The cal utility displays a simple calendar in traditional format and    ncal offers an alternative layout, more options and the date of         Easter. The new format is a little cramped but it makes a year fit      on a 25x80 terminal.  If arguments are not specified, the current       month is displayed.

         The options are as follows:
 -h      Turns off highlighting of today.

 Manual page cal(1) line 1 (press h for help or q to quit)
1.1.2 Controlling the man Page Display
The man command uses a "pager" to display documents. Normally this pager is the less command, but on some distributions it may be the more command. Both are very similar in how they perform and will be discussed in more detail in a later chapter.
If you want to view the various movement commands that are available, you can type the letter h while viewing a man page. This will display a help page:
more command as a pager, your output will be different than the example shown here. SUMMARY OF LESS COMMANDS
Commands marked with * may be preceded by a number, N.
Notes in parentheses indicate the behavior if N is given.
A key preceded by a caret indicates the Ctrl key; thus ^K is ctrl-K.
h H Display this help.
q :q Q :Q ZZ Exit.
-----------------------------------------------------------------------
MOVING
e ^E j ^N CR * Forward one line (or N lines).
y ^Y k ^K ^P * Backward one line (or N lines).
f ^F ^V SPACE * Forward one window (or N lines).
b ^B ESC-v * Backward one window (or N lines).
z * Forward one window (and set window to N).
w * Backward one window (and set window to N).
ESC-SPACE * Forward one window, but don't stop at end-of-file.
d ^D * Forward one half-window (and set half-window to N)
u ^U * Backward one half-window (and set half-window to N)
ESC-) RightArrow * Left one half screen width (or N positions).
HELP -- Press RETURN for more, or q when doneIf your distribution uses the less command, you might be a bit overwhelmed with the large number of "commands" that are available. The following table provides a summary of the more useful commands:
| Command | Function |
|---|---|
| Return (or Enter) | Go down one line |
| Space | Go down one page |
/term | Search for term |
| n | Find next search item |
| 1G | Go to beginning |
| G | Go to end |
| h | Display help |
| q | Quit man page |
1.1.3 Sections of the man Page
Man pages are broken into sections. Each section is designed to provide specific information about a command. While there are common sections that you will see in most man pages, some developers also create sections that you will only see in a specific man page.
The following table describes some of the more common sections that you will find in man pages:
| Section name | Purpose |
|---|---|
| NAME | Provides the name of the command and a very brief description. |
| SYNOPSIS | Provides examples of how the command is executed. See below for more information. |
| DESCRIPTION | Provides a more detailed description of the command. |
| OPTIONS | Lists the options for the command as well as a description of how they are used. Often this information will be found in the DESCRIPTIONsection and not in a separate OPTIONS section. |
| FILES | Lists the files that are associated with the command as well as a description of how they are used. These files may be used to configure the command's more advanced features. Often this information will be found in the DESCRIPTION section and not in a separate OPTIONS section. |
| AUTHOR | The name of the person who created the man page and (sometimes) how to contact the person. |
| REPORTING BUGS | Provides details on how to report problems with the command. |
| COPYRIGHT | Provides basic copyright information. |
| SEE ALSO | Provides you with an idea of where you can find additional information. This also will often include other commands that are related to this command. |
1.1.4 man Page SYNOPSIS Section
The SYNOPSIS section of a man page can be difficult to understand, but is very important because it provides a concise example of how to use the command. For example, consider the SYNOPSIS of the man page for the cal command:
SYNOPSIS
     cal [-3hjy] [-A number] [-B number] [[[day] month] year]
The square brackets [ ] are used to indicate that this feature is not required to run the command. For example, [-3hjy]means you can use the options -h, -j, -y, 1 or 3, but none of these options are required for the cal command to function properly.
The second set of square brackets in the cal SYNOPSIS ([[[day] month] year]) demonstrates another feature; it means that you can specify a year by itself, but if you specify a month you must also specify a year. Additionally, if you specify a day then you also need to specify a month and a year.
Another component of the SYNOPSIS that might cause some confusion can be seen in the SYNOPSIS of the date command:
SYNOPSIS
       date [OPTION]... [+FORMAT]
       date [-u|--utc|--universal] [MMDDhhmm[[CC]YY][.ss]]
In this SYNOPSIS there are two syntaxes for the date command. The first one is used to display the date on the system while the second is used to set the date.
The ellipses following [OPTION],..., indicate that one or more of the items before it may be used.
Additionally the [-u|--utc|--universal] notation means that you can either use the -u option or the --utc option or the --universal option. Typically this means that all three options really do the same thing, but sometimes this format (use of the | character) is used to indicate that the options can't be used in combination, like a logical “or".
1.1.5 Searching Within a man Page
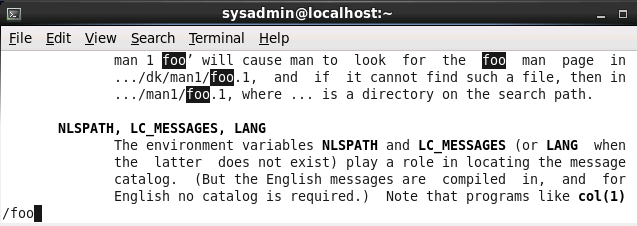
In order to search a man page for a term, press the / and type the term followed by the Enter key. The program will search from the current location down towards the bottom of the page to try to locate and highlight the term.
If the term is not found, or you have reached the end of the matches, then the program will report Pattern not found (press Return). If a match is found and you want to move to the next match of the term, press n. To return to a previous match of the term, press N.
1.1.6 man Pages Categorized by Sections
Until now, we have been displaying man pages for commands. However, sometimes configuration files also have man pages. Configuration files (sometimes called system files) contain information that is used to store information about the Operating System or services.
Additionally, there are several different types of commands (user commands, system commands, and administration commands) as well as other features that require documentation, such as libraries and Kernel components.
As a result, there are thousands of man pages on a typical Linux distribution. To organize all of these man pages, the pages are categorized by sections, much like each individual man page is broken into sections.
By default there are nine default sections of man pages:
- Executable programs or shell commands
- System calls (functions provided by the kernel)
- Library calls (functions within program libraries)
- Special files (usually found in
/dev) - File formats and conventions, e.g.
/etc/passwd - Games
- Miscellaneous (including macro packages and conventions), e.g.
man(7),groff(7) - System administration commands (usually only for root)
- Kernel routines [Non standard]
When you use the man command, it searches each of these sections in order until it finds the first "match". For example, if you execute the command man cal, the first section (Executable programs or shell commands) is searched for a man page called cal. If not found, then the second section is searched. If no man page is found after searching all sections, you will receive an error message:
sysadmin@localhost:~$ man zed
No manual entry for zed
sysadmin@localhost:~$
1.1.6.1 Determining Which Section
To determine which section a specific man page belongs to, look at the numeric value on the first line of the output of the man page. For example, if you execute the command man cal, you will see that the cal command belongs to the first section of man pages:
CAL(1) BSD General Commands Manual CAL(1)1.1.6.2 Specifying a Section
In some cases you will need to specify the section in order to display the correct man page. This is necessary because sometimes there will be man pages with the same name in different sections.
For example, there is a command called passwdthat allows you to change your password. There is also a file called passwdthat stores account information. Both the command and the file have a man page.
The passwd command is a "user" command, so the command man passwd will display the man page for the passwd command by default:
PASSWD(1) User Commands PASSWD(1)To specify a different section, provide the number of the section as the first argument of the man command. For example, the command man 5 passwd will look for the passwd man page just in section 1:
PASSWD(5) File Formats and Conversions PASSWD(5)1.1.6.3 Searching Sections
Sometimes it isn't clear what section a man page is stored in. In cases like this, you can search for a man page by name.
The -f option to the man command will display man pages that match, or partially match, a specific name and provide a brief description of each man page:
sysadmin@localhost:~$ man -f passwd
passwd (5)           - the password file
passwd (1)           - change user password
passwd (1ssl)        - compute password hashes
sysadmin@localhost:~$
Note that on most Linux distributions, the whatis command does the same thing as man -f. On those distributions, both will produce the same output.
1.1.7 Searching man Pages by Keyword
Unfortunately, you won't always remember the exact name of the man page that you want to view. In these cases you can search for man pages that match a keyword by using the -k option to the man command.
For example, what if you knew you wanted a man page that displays how to change your password, but you didn’t remember the exact name? You could run the command man -k password:
sysadmin@localhost:~$ man -k passwd
chgpasswd (8)        - update group passwords in batch mode
chpasswd (8)         - update passwords in batch mode
fgetpwent_r (3)      - get passwd file entry reentrantly
getpwent_r (3)       - get passwd file entry reentrantly
gpasswd (1)          - administer /etc/group and /etc/gshadow
pam_localuser (8)    - require users to be listed in /etc/passwd
passwd (1)           - change user password
passwd (1ssl)        - compute password hashes
passwd (5)           - the password file
passwd2des (3)       - RFS password encryption
update-passwd (8)    - safely update /etc/passwd, /etc/shadow and /etc/group
sysadmin@localhost:~$
Recall that there are thousands of man pages, so when you search for a keyword, be as specific as possible. Using a generic word, such as "the" could result in hundreds or even thousands of results.
Note that on most Linux distributions, the apropos command does the same thing as man -k. On those distributions, both will produce the same output.
1.2 info Command
Man pages are great sources of information, but they do tend to have a few disadvantages. One example of a disadvantage is that each man page is a separate document, not related to any other man page. While some man pages have a SEE ALSO section that may refer to other man pages, they really tend to be unrelated sources of documentation.
The info command also provides documentation on operating system commands and features. The goal of this command is slightly different from man pages: to provide a documentation resource that provides a logical organizational structure, making reading documentation easier.
Within info documents, information is broken down into categories that work much like a table of contents that you would find in a book. Hyperlinks are provided to pages with information on individual topics for a specific command or feature. In fact, all of the documentation is merged into a single "book" in which you can go to the top level of documentation and view the table of contents representing all of the documentation available.
Another advantage of info over man pages is that the writing style of info documents is typically more conducive to learning a topic. Consider man pages to be more of a reference resource and info documents to be more of a learning guide.
1.2.1 Displaying Info Documentation for a Command
To display the info documentation for a command, execute info command (replace command with the name of the command that you are seeking information about). For example, the following demonstrates the output of the command info ls:
File: coreutils.info,  Node: ls invocation,  Next: dir invocation,  Up: Directo\ry listing

  10.1 `ls': List directory contents
  ==================================

      The `ls' program lists information about files (of any type, including directories).  Options and file arguments can be intermixed arbitrarily, as usual.

      For non-option command-line arguments that are directories, by
  default `ls' lists the contents of directories, not recursively, and
  omitting files with names beginning with `.'.  For other non-option
  arguments, by default `ls' lists just the file name.  If no non-option
  argument is specified, `ls' operates on the current directory, acting
  as if it had been invoked with a single argument of `.'.

      By default, the output is sorted alphabetically, according to the
  locale settings in effect.(1) If standard output is a terminal, the
  output is in columns (sorted vertically) and control characters are
  output as question marks; otherwise, the output is listed one per line
  and control characters are output as-is.
  --zz-Info: (coreutils.info.gz)ls invocation, 58 lines --Top-------------
  Welcome to Info version 5.2. Type h for help, m for menu item.
Notice that the first line provides some information that tells you where you are in the info documentation. This documentation is broken up into nodes and in the example above you are currently in the ls invocation node. If you went to the next node (like going to the next chapter in a book), you would be in the dir invocation node. If you went up one level you would be in the Directory listing node.
1.2.2 Moving Around While Viewing an info Document
Like the man command, you can get a listing of movement commands by typing the letter h while reading the info documentation:
Basic Info command keys
  l           Close this help window.
  q           Quit Info altogether.
  H           Invoke the Info tutorial.
  Up          Move up one line.
  Down        Move down one line.
  DEL         Scroll backward one screenful.
  SPC         Scroll forward one screenful.
  Home        Go to the beginning of this node.
  End         Go to the end of this node.
  TAB         Skip to the next hypertext link.
  RET         Follow the hypertext link under the cursor.
  l           Go back to the last node seen in this window.
  [           Go to the previous node in the document.
  ]           Go to the next node in the document.
  p           Go to the previous node on this level.
  n           Go to the next node on this level.
  u           Go up one level.
  -----Info: *Info Help*, 466 lines --Top---------------------------------
Note that if you want to close the help screen, you type the letter l. This brings you back to your document and allows you to continue reading. To quit entirely, you type the letter q.
The following table provides a summary of useful commands:
| Command | Function |
|---|---|
| Down arrow ↓ | Go down one line |
| Space | Go down one page |
| s | Search for term |
| [ | Go to previous node |
| ] | Go to next node |
| u | Go up one level |
| TAB | Skip to next hyperlink |
| HOME | Go to beginning |
| END | Go to end |
| h | Display help |
| L | Quit help page |
| q | Quit info command |
If you scroll through the document, you will eventually see the menu for the ls command:
* Menu:

  * Which files are listed::
  * What information is listed::
  * Sorting the output::
  * Details about version sort::
  * General output formatting::
  * Formatting file timestamps::
  * Formatting the file names::

     ---------- Footnotes ----------

   (1) If you use a non-POSIX locale (e.g., by setting `LC_ALL' to
  `en_US'), then `ls' may produce output that is sorted differently than
  you're accustomed to.  In that case, set the `LC_ALL' environment
  variable to `C'.
  --zz-Info: (coreutils.info.gz)ls invocation, 58 lines --Top-------------
The items under the menu are hyperlinks that can take you to nodes that describe more about the ls command. For example, if you placed your cursor on the line "* Sorting the output::" and pressed the Enter key, you would be taken to a node that describes sorting the output of the ls command:
File: coreutils.info,  Node: Sorting the output,  Next: Details about version s\ort,  Prev: What information is listed,  Up: ls invocation
  10.1.3 Sorting the output
  -------------------------
  These options change the order in which `ls' sorts the information it
  outputs.  By default, sorting is done by character code (e.g., ASCII
  order).

  `-c'
  `--time=ctime'
  `--time=status'
       If the long listing format (e.g., `-l', `-o') is being used, print
       the status change time (the `ctime' in the inode) instead of the
       modification time.  When explicitly sorting by time (`--sort=time'
       or `-t') or when not using a long listing format, sort according
       to the status change time.

  `-f'
       Primarily, like `-U'--do not sort; list the files in whatever
       order they are stored in the directory.  But also enable `-a' (lis
  --zz-Info: (coreutils.info.gz)Sorting the output, 68 lines --Top--------
Note that by going into the node about sorting, you essentially went into a sub-node of the one in which you originally started. To go back to your previous node, you can use the u key. While u will take you to the start of the node one level up, you could also use the l key to return you exactly to the previous location that you were before entering the sorting node.
1.2.3 Exploring info Documentation
Instead of using info documentation to look up information about a specific command or feature, consider exploring the capabilities of Linux by reading through the info documentation. If you execute the info command without any arguments, you are taken to the top level of the documentation. From there you can explore many features:
File: dir,      Node: Top       This is the top of the INFO tree
    This (the Directory node) gives a menu of major topics.
    Typing "q" exits, "?" lists all Info commands, "d" returns here,
    "h" gives a primer for first-timers,
    "mEmacslt<Return>" visits the Emacs manual, etc.
    In Emacs, you can click mouse button 2 on a menu item or cross referen  ce to select it.
  * Menu:

  Basics
  * Common options: (coreutils)Common options.
  * Coreutils: (coreutils).       Core GNU (file, text, shell) utilities.
  * Date input formats: (coreutils)Date input formats.
  * File permissions: (coreutils)File permissions.
                             Access modes.
  * Finding files: (find).   Operating on files matching certain criteria.

  C++ libraries
  * autosprintf: (autosprintf).  Support for printf format strings in C+
  -----Info: (dir)Top, 211 lines --Top------------------------------------
  Welcome to Info version 5.2. Type h for help, m for menu item.
1.3 Additional Sources of Help
In many cases, you will find that either man pages or info documentation will provide you with the answers you need. However, in some cases, you may need to look in other locations.
1.3.1 Using the --help Option
Many commands will provide you basic information, very similar to the SYNOPSIS found in man pages, when you apply the --help option to the command. This is useful to learn the basic usage of a command:
sysadmin@localhost:~$  ps --help
  ********* simple selection *********  ********* selection by list *********
  -A all processes                      -C by command name
  -N negate selection                   -G by real group ID (supports names)
  -a all w/ tty except session leaders  -U by real user ID (supports names)
  -d all except session leaders         -g by session OR by effective group name
  -e all processes                      -p by process ID
  T  all processes on this terminal     -s processes in the sessions given
  a  all w/ tty, including other users  -t by tty
  g  OBSOLETE -- DO NOT USE             -u by effective user ID (supports names)
  r  only running processes             U  processes for specified users
  x  processes w/o controlling ttys     t  by tty
  *********** output format **********  *********** long options ***********
  -o,o user-defined  -f full            --Group --User --pid --cols --ppid
  -j,j job control   s  signal          --group --user --sid --rows --info
  -O,O preloaded -o  v  virtual memory  --cumulative --format --deselect
  -l,l long          u  user-oriented   --sort --tty --forest --version
  -F   extra full    X  registers       --heading --no-headi
                      ********* misc options *********
  -V,V  show version      L  list format codes  f  ASCII art forest
  -m,m,-L,-T,H  threads   S  children in sum    -y change -l format
  -M,Z  security data     c  true command name  -c scheduling class
  -w,w  wide output       n  numeric WCHAN,UID  -H process hierarchy
  sysadmin@localhost:~$
1.3.2 Additional System Documentation
On most systems, there is a directory where additional documentation is found. This will often be a place where vendors who create additional (third party) software can store documentation files.
Typically, this will be a place where system administrators will go to learn how to set up more complex software services. However, sometimes regular users will also find this documentation to be useful.
These documentation files are often called "readme" files, since the files typically have names such as README or readme.txt. The location of these files can vary depending on the distribution that you are using. Typical locations include /usr/share/doc and /usr/doc.
1.4 Finding Commands and Documentation
Recall that the whatis command (or man -f) will tell you which section a man page is stored in. If you use this command often enough, you will likely come across an unusual output, such as the following:
sysadmin@localhost:~$ whatis ls
  ls (1)               - list directory contents
  ls (lp)              - list directory contents
  sysadmin@localhost:~$
Based on this output, there are two commands that list directory contents. The simple answer to why there are two ls commands is that UNIX had two main variants, which resulted in some commands being developed "in parallel". This resulted in some commands behaving differently on different variants of UNIX. Many modern distributions of Linux include commands from both UNIX variants.
This does, however, pose a bit of a problem: when you run the ls command, which command is executed? The focus of the next few sections will be to answer this question as well as to provide you with the tools to find where these files reside on the system.
1.4.1 Where Are These Commands Located?
To search for the location of a command or the man pages for a command, use the whereis command. This command searches for commands, source files and man pages in specific locations where these files are typically stored:
sysadmin@localhost:~$ whereis ls
  ls: /bin/ls /usr/share/man/man1p/ls.1.gz /usr/share/man/man1/ls.1.gz
  sysadmin@localhost:~$
Man pages are normally easily distinguished between commands as they are normally compressed with a command called gzip, resulting in a filename that ends in .gz.
The interesting note is that you see there are two man pages listed, but only one command (/bin/ls). This is because the ls command can be used with the options/features that are described by either man page. So, when you are learning what you can do with the ls command, you can explore both man pages. Fortunately, this is more of an exception as most commands only have one man page.
1.4.2 Find Any File or Directory
The whereis command is designed to specifically find commands and man pages. While this is useful, there are times where you want to find a file or directory, not just files that are commands or man pages.
To find any file or directory, you can use the locate command. This command will search a database of all files and directories that were on the system when the database was created. Typically, the command to generate this database is run nightly.
sysadmin@localhost:~$ locate gshadow
  /etc/gshadow
  /etc/gshadow-
  /usr/include/gshadow.h
  /usr/share/man/cs/man5/gshadow.5.gz
  /usr/share/man/da/man5/gshadow.5.gz
  /usr/share/man/de/man5/gshadow.5.gz
  /usr/share/man/fr/man5/gshadow.5.gz
  /usr/share/man/it/man5/gshadow.5.gz
  /usr/share/man/man5/gshadow.5.gz
  /usr/share/man/ru/man5/gshadow.5.gz
  /usr/share/man/sv/man5/gshadow.5.gz
  /usr/share/man/zh_CN/man5/gshadow.5.gz
  sysadmin@localhost:~$
Any files that you created today will not normally be searchable with the locate command. If you have access to the system as the root user (the system administrator account), you can manually update the locate database by running the updatedb command. Regular users cannot update the database file.
Also note that when you use the locate command as a regular user, your output may be limited due to file permissions. Essentially, if you don't have access to a file or directory on the filesystem due to permissions, the locate command won't return those names. This is a security feature designed to keep users from "exploring" the filesystem by using the locate database. The root user can search for any file in the locate database.
1.4.3 Count the Number of Files
The output of the locate command can be quite large. When you search for a filename, such as passwd, the locate command will produce every file that contains the string passwd, not just files named passwd.
In many cases, you may want to start by listing how many files will match. You can do this by using the -c option to the locate command:
sysadmin@localhost:~$ locate -c passwd
  97
  sysadmin@localhost:~$
1.4.4 Limiting the Output
You can limit the output produced by the locate command by using the -b option. This option will only include listings that have the search term in the basename of the filename. The basename is the portion of the filename not including the directory names.
sysadmin@localhost:~$ locate -c -b passwd
  83
  sysadmin@localhost:~$
As you can see from the previous output, there will still be many results when you use the -b option. To limit the output even further, you place a \character in front of the search term. This character limits the output to filenames that exactly match the term:
sysadmin@localhost:~$ locate -b "\passwd"
  /etc/passwd
  /etc/cron.daily/passwd
  /etc/pam.d/passwd
  /usr/bin/passwd
  /usr/share/doc/passwd
  /usr/share/lintian/overrides/passwd
  sysadmin@localhost:~$
Все материалы взяты с официального курса NDG Linux Essential