Understanding Computer Hardware
One of the many advantages of having so many different Linux distributions is that some of them are designed to run on specific hardware platforms. In fact, there is a Linux distribution specifically designed for just about all modern hardware platforms.
Each of these hardware platforms has a great deal of variety in the hardware components that are available. In addition to several different types of hard drives, there are many different monitors and printers. With the popularity of USB devices, such as USB storage devices, cameras and cell phones, the number of available devices numbers in the thousands.
In some cases, this poses problems as these hardware devices typically need some sort of software (called drivers or modules) that allows them to communicate with the installed operating system. Hardware manufactures often provide this software, but typically for Microsoft Windows, not Linux. The Linux mascot, Tux, is however starting to appear more often on hardware products, indicating Linux support.
In addition to vendor support, there is a great deal of community support that strives to provide drivers for Linux systems. Although not all hardware has the necessary drivers, there is a good amount that does, making the challenge for Linux users and administrators to either find the correct drivers or choose hardware that has some level of support in Linux.
In this chapter, you will learn about core hardware devices, including how to use Linux commands to display vital hardware device information.
Навигация по статье:
- 1.1 Processors
- 1.2 Motherboards and Buses
- 1.2.1 dmidecode
- 1.2.2 Random Access Memory
- 1.2.3 Peripheral Devices
- 1.2.4 Universal Serial Bus Devices
- 1.3 Hardware Abstraction Layer
- 1.4 Disk Devices
- 1.5 Optical Disks
- 1.6 Video Display Devices
- 1.7 Managing Devices
- 1.8 Power Supplies
1.1 Processors
A Central Processing Unit (CPU or processor) is one of the most important hardware components of a computer. It performs the decision making as well as the calculations that need to be performed to properly run an operating system. The processor is essentially a computer chip.
The processor is connected to the other hardware via a motherboard, also known as the system board. Motherboards are designed to work with specific types of processors.
If a hardware system has more than one processor, the system is referred to as a multiprocessor. If more than one processor is combined into a single processor chip, then it is called multi-core.
Although support is available for more types of processors in Linux than any other operating system, there are primarily just two types of processors used on desktop and server computers: x86 and x86_64. On an x86 system, the system processes data 32 bits at a time; on a x86_64 the system processes data 64 bits at a time. A x86_64 system is also capable of also processing data 32 bits at a time in a backward compatible mode. One of the main advantages to a 64 bit system is that the system is able to work with more memory.
The x86 family of processors was originated by Intel in 1978 with the release of the 8086 processor. Since that time, Intel has produced many other processors that are improvements to the original 8086; they are known generically as x86 processors. These processors include the 80386 (also known as the i386), 80486 (i486), the Pentium series (i586) and the Pentium Pro series ( i686). In addition to Intel, other companies like AMD and Cyrix have also produced x86 compatible processors. While Linux is capable of supporting processors back to the i386 generation, many distributions limit their support to i686 or later.
The x86_64 family of processors, including the 64 bit processors from Intel and AMD, have been in production since around the year 2000. As a result, most of the modern processors built today are x86_64. While the hardware has been available for over a decade now, the software to support this family of processors has been much slower to develop. Even as of 2013, there are many software packages that are available for the x86 architecture, but not the x86_64.
You can see the family your CPU belongs to, using the arch command:
sysadmin@localhost:~$ arch
x86_64
sysadmin@localhost:~$
Another command you can use to identify the type of CPU in your system is the lscpu command:
sysadmin@localhost:~$  lscpu
Architecture:          x86_64
CPU op-mode(s):        32-bit, 64-bit
Byte Order:            Little Endian
CPU(s):                4
On-line CPU(s) list:   0-3
Thread(s) per core:    1
Core(s) per socket:    4
Socket(s):             1
NUMA node(s):          1
Vendor ID:             GenuineIntel
CPU family:            6
Model:                 44
Stepping:              2
CPU MHz:               2394.000
BogoMIPS:              4788.00
Virtualization:        VT-x
Hypervisor vendor:     VMware
Virtualization type:   full
L1d cache:             32K
L1i cache:             32K
L2 cache:              256K
L3 cache:              12288K
NUMA node0 CPU(s):     0-3
sysadmin@localhost:~$
The first line of this output shows that the CPU is being used in a 32 bit mode, as the architecture reported is x86_64. The second line of output shows that the CPU is capable of operating in either a 32 or 64 bit mode, therefore it is actually a 64 bit CPU.
The most detailed way of displaying information about your CPU(s) is viewing the /proc/cpuinfo file with the cat command:
sysadmin@localhost:~$ cat /proc/cpuinfo
processor       : 0
vendor_id       : GenuineIntel
cpu family      : 6
model           : 44
model name      : Intel(R) Xeon(R) CPU           E5620  @ 2.40GHz
stepping        : 2
microcode       : 0x15
cpu MHz         : 2394.000
cache size      : 12288 KB
physical id     : 0
siblings        : 4
core id         : 0
cpu cores       : 4
apicid          : 0
initial apicid  : 0
fpu             : yes
fpu_exception   : yes
cpuid level     : 11
wp              : yes
flags           : fpu vme de pse tsc msr pae mce cx8 apic sep mtrr pge mca cmov
pat pse36 clflush dts mmx fxsr sse sse2 ss ht syscall nx rdtscp lm constant_ts
arch_perfmon pebs bts nopl xtopology tsc_reliable nonstop_tsc aperfmperf pni pcl mulqdq vmx ssse3 cx16 sse4_1 sse4_2 x2apic popcnt aes hypervisor lahf_lm ida arat dtherm tpr_shadow vnmi ept vpid
While much of the output of the lscpu and the contents of the /proc/cpuinfo file appears to be the same, one benefit to viewing the /proc/cpuinfo file is that the flags of the CPU are displayed. The flags of a CPU are a very important component, since they indicate which features the CPU supports and the capabilities of the CPU.
For example, the output from the previous example contains the flag lm (long mode), indicating that this CPU is 64-bit capable. There are also flags that indicated if the CPU is capable of supporting virtual machines (the ability to have multiple operating systems on a single computer).
1.2 Motherboards and Buses
The motherboard, or system board, is the main hardware board in the computer through which the CPU, Random Access Memory (RAM) and other components are all connected together. Some devices are attached directly to the motherboard, while other devices are connected via a bus to the motherboard.
1.2.1 dmidecode
The system board of many computers contains what is known as Basic Input and Output System (BIOS). System Management BIOS (SMBIOS) is the standard that defines the data structures and how to communicate information about computer hardware. The dmidecode command is able to read and display the information from SMBIOS.
For devices directly attached to the motherboard, an administrator can use the dmidecode command to view them. There is a great deal of information provided by the output of this command.
dmidecode command. This command is not available within the virtual machine environment of this course.In the first example, you can see that the BIOS supports booting directly from the CD-ROM. This is important since operating system installs are often done by booting directly from the install CD:
# dmidecode 2.11
SMBIOS 2.4 present.
364 structures occupying 16040 bytes.
Table at 0x000E0010

Handle 0x0000, DMI type 0, 24 bytes
BIOS Information
	Vendor: Phoenix Technologies LTD
	Version: 6.00
	Release Date: 06/22/2012
	Address: 0xEA0C0
	Runtime Size: 89920 bytes
	ROM Size: 64 kB
	Characteristics:
		ISA is supported
		PCI is supported
		PC Card (PCMCIA) is supported
		PNP is supported
		APM is supported
		BIOS is upgradeable
		BIOS shadowing is allowed
		ESCD support is available
		Boot from CD is supported
--More--
In the next example, you can see that a total of 2048 (about 2GB) of RAM is installed on the system:
Socket Designation: RAM socket #0
Bank Connections: None
Current Speed: Unknown
Type: EDO DIMM
Installed Size: 2048 MB (Single-bank Connection)
Enabled Size: 2048 MB (Single-bank Connection)
Error Status: OK
1.2.2 Random Access Memory
The motherboard normally has slots where Random Access Memory (RAM) can be connected to the system. 32 bit architecture systems can use up to 4 gigabytes (GB) of RAM, while 64 bit architectures are capable of addressing and using far more RAM.
In some cases, the RAM your system has might not be enough to handle all of the operating system requirements. Each program needs to store data in RAM and the programs themselves are loaded into RAM when they execute.
To avoid having the system fail due to a lack of RAM, virtual RAM (or swap space) is utilized. Virtual RAM is hard drive space that is used to temporarily store RAM data when the system is running out of RAM. Data that is stored in RAM and that has not been used recently is copied on to the hard drive so currently active programs can use the RAM. If needed, this swapped data can be stored back into RAM at a later time.
To view the amount of RAM in your system, including the virtual RAM, execute the free command. The free command has a -m option to force the output to be rounded to the nearest megabyte and a -g option to force the output to be rounded to the nearest gigabyte:
sysadmin@localhost:~$ free -m
             total       used       free     shared    buffers     cached
Mem:          1894        356       1537          0          25       177
-/+ buffers/cache:        153       1741
Swap:         4063          0       4063
sysadmin@localhost:~$
The output of executing this free command shows that the system it was executed on a system has a total of 1,894 megabytes and is currently using 356 megabytes.
The amount of swap appears to be approximately 4 gigabytes, although none of it appears to be in use. This makes sense because so much of the physical RAM is free, so there is no need at this time for virtual RAM to be used.
1.2.3 Peripheral Devices
The motherboard has buses that allow for multiple devices to connect to the system, including the Peripheral Component Interconnect (PCI) and Universal Serial Bus (USB). The motherboard also has connectors for monitors, keyboards and mice.
In order to view all of the devices connected by the PCI bus, execute the lspci command. The following is a sample output of this command. As you can see below in the highlighted sections, this system has a VGA controller (a monitor connector), a SCSI storage controller (a type of hard drive) and an Ethernet controller (a network connector):
lspci command. This command is not available within the virtual machine environment of this course.sysadmin@localhost:~$ lspci 00:00.0 Host bridge: Intel Corporation 440BX/ZX/DX - 82443BX/ZX/DX Host bridge (rev 01) 00:01.0 PCI bridge: Intel Corporation 440BX/ZX/DX - 82443BX/ZX/DX AGP bridge (rev 01) 00:07.0 ISA bridge: Intel Corporation 82371AB/EB/MB PIIX4 ISA (rev 08) 00:07.1 IDE interface: Intel Corporation 82371AB/EB/MB PIIX4 IDE (rev 01) 00:07.3 Bridge: Intel Corporation 82371AB/EB/MB PIIX4 ACPI (rev 08) 00:07.7 System peripheral: VMware Virtual Machine Communication Interface (rev 10) 00:0f.0 VGA compatible controller: VMware SVGA II Adapter 03:00.0 Serial Attached SCSI controller: VMware PVSCSI SCSI Controller (rev 02 0b:00.0 Ethernet controller: VMware VMXNET3 Ethernet Controller (rev 01)
Executing the lspci command with the -nn option shows both a numeric identifier for each device, as well as the original text description:
sysadmin@localhost:~$ lspci -nn
00:00.0 Host bridge [0600]: Intel Corporation 440BX/ZX/DX - 82443BX/ZX/DX Host bridge [8086:7190] (rev 01)
00:01.0 PCI bridge [0604]: Intel Corporation 440BX/ZX/DX - 82443BX/ZX/DX AGP bridge [8086:7191] (rev 01)
00:07.0 ISA bridge [0601]: Intel Corporation 82371AB/EB/MB PIIX4 ISA [8086:7110](rev 08)
00:07.1 IDE interface [0101]: Intel Corporation 82371AB/EB/MB PIIX4 IDE [8086:7111] (rev 01)
00:07.3 Bridge [0680]: Intel Corporation 82371AB/EB/MB PIIX4 ACPI [8086:7113](rev 08)
00:07.7 System peripheral [0880]: VMware Virtual Machine Communication Interface [15ad:0740] (rev 10)
00:0f.0 VGA compatible controller [0300]: VMware SVGA II Adapter [15ad:0405]
03:00.0 Serial Attached SCSI controller [0107]: VMware PVSCSI SCSI Controller
[15ad:07c0] (rev 02)
0b:00.0 Ethernet controller [0200]: VMware VMXNET3 Ethernet Controller
[15ad:07b0] (rev 01)
The highlighted section, [15ad:07b0], is referred to as the [vendor:device] section.
Using the [vendor:device] information can be useful for displaying detailed information about a specific device. By using the -d vendor:device option, you can select to view information about just one device.
You can also view more detailed information by using either the -v, -vv or -vvv option. The more v characters, the more verbose the output will be. For example:
sysadmin@localhost:~$ lspci -d 15ad:07b0 -vvv
0b:00.0 Ethernet controller: VMware VMXNET3 Ethernet Controller (rev 01)
        Subsystem: VMware VMXNET3 Ethernet Controller
        Physical Slot: 192
        Control: I/O+ Mem+ BusMaster+ SpecCycle- MemWINV- VGASnoop- ParErr- Step
ping- SERR- FastB2B- DisINTx+
        Status: Cap+ 66MHz- UDF- FastB2B- ParErr- DEVSEL=fast >TAbort- <TAbort-
<MAbort- >SERR- <PERR- INTx-
        Latency: 0, Cache Line Size: 32 bytes
        Interrupt: pin A routed to IRQ 19
        Region 0: Memory at fd4fb000 (32-bit, non-prefetchable) [size=4K]
        Region 1: Memory at fd4fc000 (32-bit, non-prefetchable) [size=4K]
        Region 2: Memory at fd4fe000 (32-bit, non-prefetchable) [size=8K]
        Region 3: I/O ports at 5000 [size=16]
        [virtual] Expansion ROM at fd400000 [disabled] [size=64K]
        Capabilities: <access denied>
        Kernel driver in use: vmxnet3
        Kernel modules: vmxnet3
sysadmin@localhost:~$
The lspci command shows detailed information about devices connected to the system via the PCI bus. This information can be helpful to determine if the device is supported by the system, as indicated by a Kernel driver or Kernel module in use, as shown in the last couple of lines of output above.
1.2.4 Universal Serial Bus Devices
While the PCI bus is used for many internal devices such as sound and network cards, many external devices (or peripherals) are connected to the computer via USB. Devices connected internally are usually cold-plug, meaning the system must be shut down in order to connect or disconnect a device. USB devices are hot-plug, meaning they can be connected or disconnected while the system is running.
lsusb command. This command is not available within the virtual machine environment of this course.To display the devices connected to the system via USB, execute the lsusb command:
sysadmin@localhost:~$ lsusb
Bus 001 Device 001: ID 1d6b:0001  Linux Foundation 1.1 root hub
sysadmin@localhost:~$
The verbose option, -v, for the lsusb command shows a great amount of detail about each device:
sysadmin@localhost:~$ lsusb -v

Bus 001 Device 001: ID 1d6b:0001  Linux Foundation 1.1 root hub
Couldn’t open device, some information will be missing
Device Descriptor:
        bLength		       18
	bDescriptorType	 	1
	bcdUSB		     1.10
	bDeviceClass		9 Hub
	bDeviceSubClass		0 Unused
	bDeviceProtocol		0 Full speed (or root) hub
	bMaxPacketSize0	       64
	idVendor	   0x1d6b Linux Foundation
	idProduct	   0x0001 1.1 Linux Foundation
	bcDevice	     2.06
	iManufacturer		3
	iProduct		2
	iSerial			1
	…
1.3 Hardware Abstraction Layer
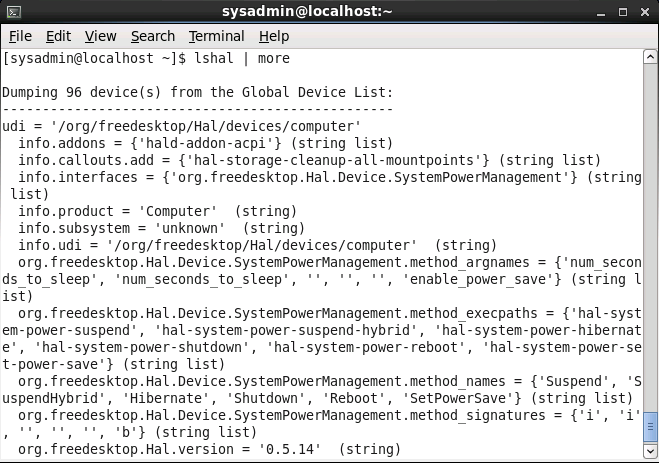
HAL is the Hardware Abstraction Layer. The daemon for HAL is hald, a process that gathers information about all devices connected to the system. When events occur that change the state of the connected devices, such as when a USB device is attached to the system, then hald broadcasts this new information to any processes that have registered to be notified about new events.
lshal command. This command is not available within the virtual machine environment of this course.The lshal command allows you to view the devices detected by HAL. This command produces a huge amount of output; the following provides a small sample:
1.4 Disk Devices
Disk devices (AKA, hard drives) may be attached to the system in a number of ways; the controller may be integrated into the motherboard, on a PCI (Peripheral Component Interconnect) card or a USB device.
Hard drives are divided into partitions. A partition is a logical division of a hard drive, designed to take a large amount of available storage space and break it up into smaller "chunks". While it is common on Microsoft Windows to have a single partition for each hard drive, on Linux distributions, multiple partitions per hard drive is common.
Some hard drives make use of a partitioning technology called Master Boot Record (MBR) while others make use of a partitioning type called GUID Partitioning Table (GPT). The MBR type of partitioning has been used since the early days of the Personal Computer (PC) and the GPT type has been available since the year 2000.
An old term used to describe an internal hard disk is "fixed disk", as the disk is fixed (not removable). This term gave rise to several command names: the fdisk, cfdisk and sfdisk commands, which are tools for working with the MBR partitioned disks.
The GPT disks use a newer type of partitioning, which allows the user to divide the disk into more partitions than what MBR supports. GPT also allows having partitions which can be larger than two terabytes (MBR does not). The tools for managing GPT disks are named similar to the fdisk counterparts: gdisk, cgdisk, and sgdisk.
There is also a family of tools that attempts to support both MBR and GPT type disks. This set of tools includes the parted command and the graphical gparted tool.
Hard drives are associated with file names (called device files) that are stored in the /dev directory. Different types of hard drives are given slightly different names: hd for IDE (Intelligent Drive Electronics) hard drives and sd for USB, SATA (Serial Advanced Technology Attachment) and SCSI (Small Computer System Interface) hard drives.
Each hard drive is assigned a letter, for example, the first IDE hard drive would have a device file name of /dev/hda and the second IDE hard drive would have be associated with the /dev/hdb device file.
Partitions are given unique numbers for each device. For example, if a USB hard drive had two partitions, they could be associated with the /dev/sda1 and /dev/sda2 device files.
In the following output, you can see that this system has three sd devices: /dev/sda, /dev/sdb and /dev/sdc. Also, you can see there are two partitions on the first device (as evidenced by the /dev/sda1 and /dev/sda2 files) and one partition on the second device (as evidenced by the /dev/sdb1 file):
root@localhost:~$  ls /dev/sd*
/dev/sda /dev/sda1  /dev/sda2  /dev/sdb  /dev/sdb1  /dev/sdc
root@localhost:~$
In the following example, the fdisk command is used to display partition information on the first sd device.
root@localhost:~# fdisk -l /dev/sda
Disk /dev/sda: 21.5 GB, 21474836480 bytes
255 heads, 63 sectors/track, 2610 cylinders, total 41943040 sectors
Units = sectors of 1 * 512 = 512 bytes
Sector size (logical/physical): 512 bytes / 512 bytes
I/O size (minimum/optimal): 512 bytes / 512 bytes
Disk identifier: 0x000571a2

   Device Boot      Start         End      Blocks   Id  System
/dev/sda1   *        2048    39845887    19921920   83  Linux
/dev/sda2        39847934    41940991     1046529    5  Extended
/dev/sda5        39847936    41940991     1046528   82  Linux swap / Solaris
root@localhost:~#
1.5 Optical Disks
Optical disks, often referred to as CD-ROMs, DVDs, or Blue-Ray are removable storage media. While some devices used with optical disks are read-only, others are capable of burning (writing to) disks, when using a writable type of disk. There are various standards for writable and rewritable disks, such as CD-R, CD+R, DVD+RW, and DVD-RW. These media standards go beyond the scope of the curriculum.
Where these removable disks are mounted in the file system is an important consideration for a Linux administrator. Modern distributions often mount the disks under the /media folder, while older distributions typically mount them under the /mnt folder.
Upon mounting, most GUI interfaces will prompt the user to take an action, such as open the contents of the disk in a file browser or start a media program. When the user is finished using the disk, it is prudent to unmount it using a menu or the eject command. While pressing the eject button will open the disk tray, some programs will not realize that the disk is no longer mounted on the filesystem.
1.6 Video Display Devices
In order to display video (output to the monitor), the computer system must have a video display device (AKA, video card) and a monitor. Video display devices are often directly attached to the motherboard, although they can also be connected through the PCI bus slots on the motherboard.
Unfortunately, since the early days of the PC, no video standard has been approved by the major vendors, so each video display device usually requires a proprietary driver provided by the vendor. Drivers are software programs that allow the operating system to communicate with the device.
Drivers must be written for the specific operating system, something that is commonly done for Microsoft Windows, but not always for Linux. Fortunately, the three largest video display vendors all now provide at least some level of Linux support.
There are two types of video cables commonly used: the analog 15 pin Video Graphics Array (VGA) cable and the 29 pin Digital Visual Interface (DVI).
In order for monitors to work properly with video display devices, they must be able to support the same resolution as the video display device. Normally, the software driving the video display device (commonly the X.org server) will normally be able to automatically detect the maximum resolution that the video display and monitor can both support and set the screen resolution to that value.
Graphical tools are normally provided to change your resolution, as well as the maximum number of colors that can be displayed (known as the color depth) with your Linux distribution. For distributions using the X.org server, the /etc/X11/xorg.conf file can be used to change resolution, color depth and other settings.
1.7 Managing Devices
In order for a device to be used in Linux, there may be several different kinds of software required. First of all there is the driver software. The driver could be compiled as part of the Linux kernel, loaded into the kernel as a module or loaded by a user command or application. Most devices have the driver either built-in to the kernel or have it loaded into the kernel, as the driver may require the low-level kind of access that the kernel has with devices.
External devices, like scanners and printers, typically have their drivers loaded by an application and these drivers in turn communicate through the device via the kernel through an interface such as USB.
In order to be successful in enabling devices in Linux, it is best to check the Linux distribution to see if the device is certified to work with that distribution. Commercial distributions like Red Hat and SUSE have web pages dedicated to listing hardware that is certified or approved to work with their software.
Additional tips on being successful with connecting your devices: avoid brand new or highly specialized devices and check with the vendor of the device to see if they support Linux before making a purchase.
1.8 Power Supplies
Power supplies are the devices that convert alternating current (120v, 240v) into direct current, which the computer uses at various voltages (3.3v, 5v, 12v, etc.). Power supplies are generally not programmable, however their proper function has a major impact on the rest of the system.
Although they are not surge suppressors, these devices often protect the computer from fluctuations in voltage coming from the power source. It is wise for a network administrator to choose a power supply based on quality rather than price, since a failing power supply can result in major destruction to a computer system.
Все материалы взяты с официального курса NDG Linux Essential